Character Controller
ACF have two different AnimationBlueprint to animate your characters, both of them are template so can be used with any skeleton.
● The ACF_Template_ABP which is based on Lyra logic and animations together with the
ACF_BaseMoveset.
● The ACF_SimpleTemplate_ABP which uses traditional animation with 8 directional blendspaces.
● The ACF_MMTemplate_ABP (NEW 5.5!) animblueprint using the new Motion matching. Replication for this ABP is currently in BETA!
All the Animation Blueprints have perfect data decoupling being “pure logic”, all the data is handled throught the usage of Linked Animation Layers. Animation Layers are additional AnimBlueprint used to fill the main blueprint with all the animations needed by giving the possibility to “swap” between layers at runtime, so that you can change your animations when, for instance, you change weapons.
In ACF, inside both the ACF Templates, we have different kind of Animation layers:

Moveset Layers: Here is where you should put your full body locomotion animation for the character.
Overlay Layers: Used to set the animations that will be blended on the top body of your character. You can decide do only apply an overlay when you equip a weapon instead of changing the whole Moveset Layer.
Rider Layer: Contains the animations and blendspace to be played when the character is riding a mount. You may a have a Riding Layer for every type of mount you have to define the mount-specific animations (Es Mounting a horse will have different animations than mounting a car).
IKLayer: An animation BP to manage IK, by default it has feet and hands IK.
NOTE: Currently the Motion Matching Template only supports Overlay Layers and Rider Layer!

Layers are associated to GameplayTags so you can switch between layers at runtime with the following nodes:
Rider layer are automatically activated when you start riding and you can configure the required Layer tag inside the ACFMountComponent in the Mount blueprint itself.
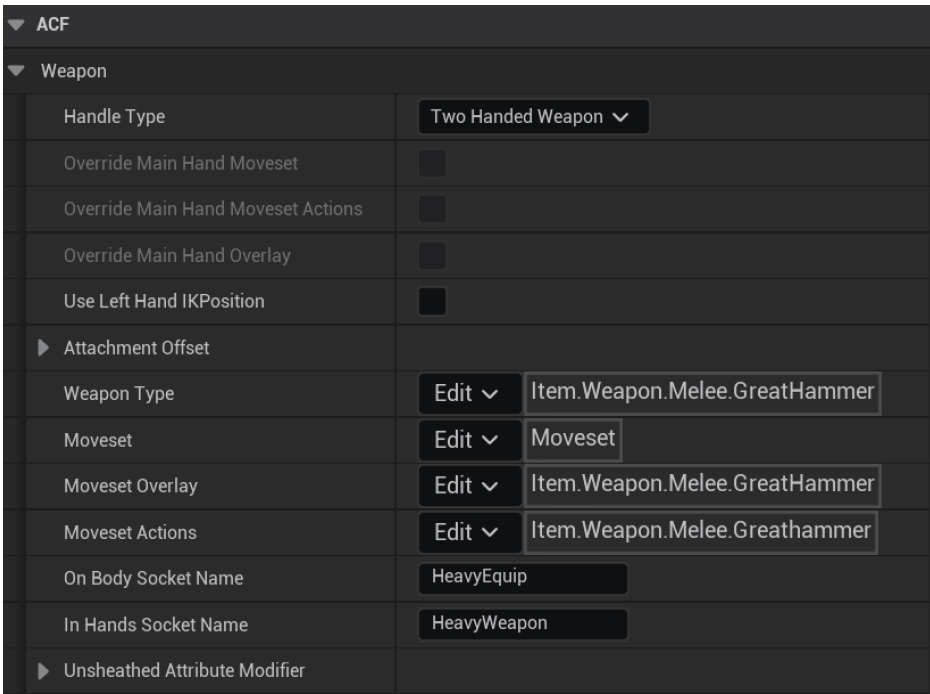
MovesetsLayers and OverlayLayers are switched automatically when equip a weapon in your hands with the tags specified in the Weapon itself, but you can always switch them manyally with those nodes available in both your character and you ACFAnimInstance.
Creating New Layers
To create new Layers you just need to create a child AnimBlueprint from the one provided by ACF itself:
ACF Moveset Layer
If you are using ACF_Template_ABP you’d need to create a child AnimBP starting from ACF_BaseMoveset as a base class and add all your custom animations there. NOTE: this AnimBP requires ROOT MOTION animations with ROOT Motion enabled and those notify for footsteps to enable Stride Warping).

If you are using ACF_SimpleTemplate_ABP you’d need to create a child class starting from ACF_SimpleMoveset OR ACF_QuadrupedMoveset and fill those to require data.
ACF_SimpleMoveset : more suited for humanoid like locomotion with strafe movement
ACF_QuadrupedMoveset : suited for quadruped style locomotion with turn movement
ACF Overlay Layer
To create an Overlay layer you’d need to subclass the ACF_BaseOverlay AnimBP and fill it with your overlay data, in paticular the Aim Offset, to be always applied, and a set of “upper body” animations that will be blended on top to the ofrom the ACF MovesetLayer with the specific alpha and switched depending on the current state (es: when aiming, blocking etc.)

Once Created, layers need to be set inside the main Animblueprint to be automatically (or manually) activated and switched.
HINT: If no GameplayTag are selected, the Root tag as provided in Project Settings / Ascent Combat Framework will be used
Example configuration for ACF_BaseMoveset:
Moveset Layers will be assigned at the end in the Animation Blueprint. Following properties are
configurable in a Moveset Layer.